Contents of this very long article on starting a garden:
- Lasagna gardening - an explanation
- How to make a no till garden on your lawn
- Raised gardens
- Organic Mulch Layers
- How to plant in a lasagna garden
- Weeding
- Going Vertical
Lasagna gardening is a no-dig, no-till organic gardening method that results in rich soil with very little work from the gardener. The name "lasagna gardening" refers to the buildup of layers of organic material on top of cardboard or thick newspaper, also known as “sheet composting."
One of the best things about lasagna gardening is how easy it is. You don't have to remove existing sod and weeds or dig at all. The first layer consists of either brown corrugated cardboard or at least six layers of newspaper laid directly on top of the grass or weeds in the area you've selected for your garden. Cover the garden areas with cardboard as soon as the snow is gone. Corrugated cardboard, that used for brown boxes, is best for the food areas. Worms love it! You can use other types of cardboard for the paths and open areas, i.e. soda can cases, cereal boxes, magazines. While you don't need to remove the grass and weeds, I would remove rocks. They are great for holding cardboard in place or using for stepping stones through the growing plants.
 Wet the cardboard/paper area down to keep everything in place and layer with organic materials. The grass and/or weeds underneath will break down fairly quickly because they will be smothered by the newspaper or cardboard, as well as by the materials you're going to layer on top of them. Overlay the edges, or the grass will grow through! This layer also provides a dark, moist area to attract earthworms that will loosen up the soil as they tunnel through it. If you don't yet have organic layers, you can keep the cardboard down with rocks, bricks, logs or anything else you have that will keep it from blowing away.
If you already have larger plants in place, layer the cardboard around them, giving them an inch or so of space to keep the wet cardboard from touching the stems. Layer organic mulch on top of this. Do this as the summer wears on and the initial paper/cardboard starts to break down. Continue to layer around the mature plants to keep the grass and weeds from growing. When making a garden on a lawn, grass will be a more insidious problem than weeds.

It's a great way to get rid of your lawn. If you're on a reasonably small city lot, what do you need grass for anyway? It has no practical value and takes a lot of chemicals poured on it to keep it looking nice. (Why anyone would pour deadly, noxious chemicals in the earth for a useless lawn is beyond me.) If you have soft lawn, you don't need it tilled first. If you have hard clay, gravel, etc and are adding top soil/manure, I would till it first if you want to use it right away or make raised gardens. (See below.) If you are going to wait until the following year, let the worms do it for you under the cardboard.
Raised Gardens:
If your ground is very hard clay, gravel, sand or rock, I would recommend making raised gardens. They don't have to be deep but higher sides makes gardening easy for people with bad backs or physical limitations. Also keep it narrow enough to reach across from one side. Three feet is the widest across I would build one. It can be any length or even U-shaped. Build boxes to contain soil on top of the lawn. You will still need to do the layering with cardboard/paper inside the box. You would be surprised how far some grass and weeds will grow to survive!
 Filling the raised boxes: "Hugel Culture" (Hugelkulture) is making beds on top of log piles. Its quickly catching on as a way to make raised garden beds, letting the old logs feed the soil and plants. Fill those raised beds with natural branches and logs on top of the cardboard, before you fill it with soil. You will need less soil. Put several inches of soil on top of the wood. Layer this with mulch to keep the weeds down. They will grow on any open dirt spots, even in raised beds. The wood will decompose and feed the soil, gradually. The plant roots will grow into it. In three years the logs will be gone, making rich soil.

If building tall boxes, fill the bottom with something to take up the space, something inert, nontoxic that the plant roots can grow around so you will need less soil. Top soil is hard to find here. Suggestions are: natural branches and logs (NOT railway ties, landscaping ties or pressure treated!), styrofoam packing pieces broken up small and styrofoam peanuts, small water bottles, crushed milk jugs, soda cans. Leave enough space for about 1.5 feet of soil on top, after it filters down through the space fillers at the bottom. Don't leave air pockets. Make sure the spaces are filled with soil all the way down. Mix in a little well composted manure in the bottom soil.


You can make raised beds out of anything that will hold the soil in. Square straw (not hay!) bales are becoming popular for raised bed sides. Its not ideal to use pressure treated wood, but if you line the boxes all the way around and over the top with heavy plastic, it will be fine. You can use metal roofing or panels for sides.
Large logs make good raised garden sides. Cement blocks can be used if they have been outside for a couple of years so the strong lime has been leached out of them. Otherwise, I would line a cement block garden with heavy plastic.
Raised bed are also easy to cover. Use 1" pvc for the arches, cover with plastic for a mini greenhouse, or curtain sheers for protection from deer, cabbage moths, etc.

Organic Mulch Layers
Anything that does not contain meat, dairy, egg products of any kind, or sprayed can be used as mulch on the cardboard/paper. Meat products, eggs, dairy will stink terribly and attract wildlife that you don't want in your garden (bears!). Its also not a good idea to use processed food/ grains/ cereals in your compost pile. Never put cereal in it that has had milk on it! If you use something that has been sprayed with weed killer or herbicide, it will kill your plants.
Some choices for organic mulch layers:
1. Manure! I would recommend using well composted ** (See Note below) manure around the growing areas directly on top of the cardboard/paper. If your lawn has been growing grass and/or weeds, the soil will be depleted. Also any wood based layers you have will use up the nitrogen in the soil as they break down. The manure will fix that and replace any other needs in the depleted soil.
2. Grass clipping after mowing, if not sprayed,
3. Fall leaves, mowed to chop them up,
4. Shredded computer paper. Ask offices for it. Its wood based,
5. Wood chips * (See Note below on wood based mulch in the garden),
6. Straw,
7. Hay, only if going on top of cardboard. Don't put it directly on the ground or you will be growing grass there,
*NOTE: Wood based products are fine in the garden, as long as you add some well composted manure for extra nitrogen. Wood uses up the nitrogen in the soil to decompose.
**NOTE: Make sure any cow/sheep manure you use has been properly composted: piled for a season so it gets really hot, hot enough to kill the weed seeds, or you will be growing grass and weeds. If you are not sure how hot it has been composted, put it underneath the cardboard. If it has not aged enough, the high nitrogen content will kill your plants. Chicken manure needs to age for two years before you can safely put it on your plants. Store bought manure is fine.
Planting: For the seed rows,
Option #1: Put down a layer of fine soil or compost on top of the mulch for the seed rows and plant in it. Top the seeds with soil and press down lightly. A rule of thumb for how deep to plant seeds: Soil on top of seed should only be as tall as the length of the seed. So something like carrot seed should only have a light sprinkle of soil on top. The roots will grow down through the layers and eventually through the cardboard.
Option #2: Lay the initial layer of cardboard, leaving 1.5" - 2" inch rows open on the ground for planting seeds. Cover the cardboard with organic layers. On top of the organic layers, keeping it visible, cover your open seeding rows with cardboard you have weighed down with rocks or bricks to hold it in place temporarily. When planting time comes, most grass and weeds will be dead and smothered under the cardboard. Remove the top cardboard over the planting rows. Plant seeds directly in the ground in these very narrow rows and cover lightly with a layer of compost. Water very gently and press down lightly.
For myself, I usually use a shovel and dig up just these narrow rows and remove grass clods, roots and any perennial weeds before laying down the cardboard. However, I don't believe its entirely necessary. I just like to spend a little time in the spring digging in the dirt :) .
For transplants, simply pull back the layers of mulch, drop in the plant and pull some mulching materials back over the roots. Leave a little space around the plant for air circulation.
Weeding: As you watch these rows grow, carefully leaving only the sprouting vegetables, pull up or cut off any weeds/grass that grows. If not sure, just leave it to grow awhile and then pull up or dig out any weeds that grow in this row with the vegetables. If left to grow, grass will become a more insidious problem than the weeds. As long as the weeds don't go to seed or interfere with the growth of the baby vegetables, they can be left to grow until its safe to remove them without damaging your tender, baby vegetable plants. There won't be much to weed out and once it's gone, weeding these very narrow rows will be easy. When the vegetable plants are tall enough and you have thinned them, place cardboard and mulch between the plants to keep the weeds/grass down. Keep placing cardboard and inches of mulch wherever grass and weeds begin to grow.
I recommend setting aside one day every week for weeding. Using a hoe for larger seedlings or by hand with smaller ones, weed the entire garden, covering with cardboard those areas where the grass and weeds are growing. If you have been using the cardboard everywhere around the plants and in the open areas, there won't be much to do. One morning a week, weeding needs to be your focus, everything else waits. If you do this, you won't have a weeding problem and gardening will be fun and easy. Pull baby weeds as you do your daily walk through your garden to see the changes and just to enjoy your garden growing. Pull any grass and weeds you see when they are little. Don't let the work get ahead of you or it will take time to catch it back up. Note: Control the grass. Grass is hard to control once it takes over.
Going Vertical


If you only have a little space, grow vertical! Make tall plants trellises over the pathways. If you are growing something like squash or melons vertically, you will need strong supports to hold the vine up and something extra to hold the fruit.
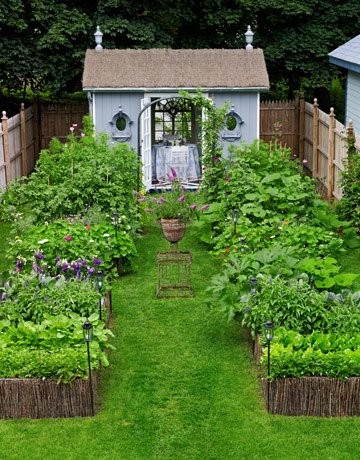
 |
| (Not my yard) |
Lasagna gardening is definitely the way to build vegetable or flower beds! We use this method for both. Because it uses no power tools, heavy equipment or expensive commercial additives, lasagna gardening is an easy way for anyone to maintain garden productivity.
If you have deer or large dogs roaming around the neighborhood, you might want to put a fence around it. It will keep out the dogs, anyway...

 A few days ago I saw a post on the Facebook "Grow Food Not Lawns" group about successfully germinating strawberry seeds. It reminded me that I have strawberry seed and I could do this too!


