Making outdoor wreaths is much more simple than the indoor wreaths in the previous "Indoor Wreath" blog post.
 For this project you are going to need grapevine dried into a circle, covered wire, thin light wire, pinecones and evergreen branches. You can also add any little red berries and bells that you might have and you will need a big bow.
 Start with the same grapevine as in the previous post. The directions are the same as far as making the initial wreath, however, for an outdoor wreath you need to wrap the wire closer. All of the greenery stem will be held in place by the wire, so it needs to be wrapped close for a full wreath.
 When you have the wreath completely wrapped with wire and the hanger on the back then you prepare the pinecones. Any pinecones will look good. I have both the short, squat, round ones and the long, curved ones. I am going to use the long, curved ones for this wreath. The pinecones are wired to the wreath so they can withstand outdoor winds.
After you have wired all of the pinecones you plan to use, you can start to attach them to the wreath. Wrap the wire around the wire on the wreath, securing the base of the pinecone. Take a small piece of wire and also secure the top of the pinecone to the wreath, making sure the wire does not show. This will keep the pinecones from coming off in a storm or hanging down if they become loose.


When all of the pinecones are attached, you begin to add the greenery.
 Cut the greenery into small pieces. I have collected both pine and cedar here. It takes a lot to make a wreath, more than you think. I made one large full wreath from one wheel barrow full of greenery. Any everygreen will make a nice wreath. I have also used spruce which looks very nice. I particularly like the cedar due to the sweet scent, but the spruce has a stong everygreen scent that is nice too.

This is about the right size for a wreath. I cut a small pile to start with and continue to cut them as I go.

Stick the bottom of the cut branch piece under the wire. I do across the wreath in one area first, getting the outside of the circle and the inside, as well as the front. It is not necessary to leave spaces for the pinecones as you can cut the tiny pieces hiding the pinecones off the branch later.
Go all the way around the wreath, making it as full as you can. When you have done the entire circle, go back and fill in any open spots until you are happy with the wreath.

 Using the clippers, remove any small pieces that cover a pinecone. Make sure you leave enough greenery to cover any wire.

When your wreath is completely filled in and finished, it is time to add the bow.
 Directions for making a bow are on the previous "Indoor Wreath" blog post.

Wire the bow onto the wreath. You can wire two long pinecones handing down under the bow and some berries above it. You will need to attach wire to any berries, bells or other decorations you want to add. Everything needs to be wired on to withstand the freezing temps and winds outdoors.


 This picture above is not my cellar. It belongs to someone else. Someone with a lot more time, energy and planning than myself. This is my dream, my goal for our cellar.We have the underground stone root cellar. Its one thing I love about old, old farm houses. I love old farmsteads. The old houses have such character and so many details that are left out of the newly built homes and barns.
 Some cold cellars are built into a hillside, separate from the house, but that makes them difficult to access during the hard, cold, stormy winter when the doorway is buried under feet of snow.

Our cold cellar is in the basement, under the front porch to be exact. Our basement is unfinished and unheated throughout the winter and so is the cold cellar.
Cold cellars are also called "root cellars" and are not necessarily used just for roots but are also used to store jars of jams, pickles, etc, as well as tender and tropical bulbs and plants that need to stay above freezing in the winter. It can also be used for a spare fridge for a lot of the year. This is a box of eggs destined for the Salvation Army Soup Kitchen.
The cold cellar needs to be below the frost line to keep the food from freezing, but unheated to keep it cold enough. It also needs to be a bit damp, as most underground cold cellars are.So many vegetables that we grow in the north can be kept all winter in the right conditions. Unfortunately it is sometimes difficult to provide just the right conditions for every vegetable. Each one can require something different. All you can do is provide what you can and check on them often, removing first the ones that look like they are not going to go the distance. This is where a canner or freezer comes in handy. After the first winter with a cold cellar and your vegetables, you  will have a general idea of what you can keep in your cellar and what needs to be kept in a different environment.
Below is a list of a few of the most common vegetables that we have in this area and how to keep them in a cold cellar. Some of them do not really require "cold" but can be hung and kept dry at room temperature. Very few vegetables will survive being kept damp at room temperature. We try not to use peat, since it is a quickly dwindling natural resource. Some tropicals and tender flowers are also discussed below. Important Note: Do not store apples (or anything else that produces ethylene gas) in the same room with other vegetables or fruits, It will cause them to ripen and sprout prematurely. Potatoes are especially suseptible. Yes, this means you cannot store your potatoes and apples in the same room, unfortunately, not if you expect the potatoes to keep very long.
 * Carrots: Pack in damp sand. Keep damp and very cold, just above freezing.
 *
*
Onions and garlic: Keep dry at room temperature. Separate them until the tops are completely dry then braid the tops and hang the braids in your kitchen for a country decoration or hang in netting to keep dry. You can also dry them and make your own onion/garlic powder. Commercial spices contain filler. Homemade is so much better!
* Most hard skinned winter squash: After curing at room temp, store in a cool but not too cold, dry area with good air circulation. No cold cellar needed for these. Shelves in a closet with openings in the door would be a good place, but not in the bathroom or kitchen where it will be too damp. Store acorn squash in a slightly cooler and moister environment without curing. Some people keep them under the bed in a cool room. We keep them in a rarely used dining room.
 * Cabbage: Hang in a damp cold cellar, roots and all, or cut heads, remove loose outer leaves and spread one layer deep on shelves in a damp root cellar. Keep as damp and as close to freezing as possible.
* Rutabagas and Turnips: Cool (not too cold) and dry. Do not wash before storing. You can give Rutabagas a quick, light dip in hot wax to seal them in order to keep them even longer, but they will keep for a few months in the right conditions without the wax.
* Potatoes: Keep just above freezing (40*F). Don't wash or get wet before storing.
* Beets: Cut the tops to 1" and dont cut the root tip off. Store very cold, just above freezing and very damp.
* Apples: Store very cold, just above freezing and very damp. Do not store withother vegetables.
I know its hard to find a separate place to keep apples just above freezing.
Perhaps it is possible to close off a small corner with heavy, air tight
plastic. I have considered doing this but have not tried it yet. I may do that this year, if we buy apples in bulk.
 I also store my tender bulbs in the cold cellar. I grow cannas, calla lilies, dahlias, glads and elephant ears. I also plan to overwinter the four o'clocks I grew this year in the cold cellar.

Canna lilies like to be kept quite damp in storage and just above freezing. I have tried several methods of overwintering them. Last year I put the cannas in a single row in a box and set it directly on the stone (we have a field stone cellar). I also wrapped some little dahlias and small cannas in newpaper and piled them in a clothesbasket in the cellar. I lost a few of those so I won't be doing that this year. All the cannas that were in the bottom of the box on the stone survived very well, so I will be keeping all of the cannas and a lot of the other tender bulbs that way this winter. I have read that dahlias do well in a plastic bucket with the lid on, so I will be trying that with some of the dahlias.
This is my best beloved dahlia, 'Keri Blue'.

We picked apples today! It was such a beautiful day for it too! We are having a summer-like week this week with warm temps and sun, all week long. It's a good time to get some fall work done outside!
A friend and I picked the apples this morning while Hubby worked on another job.
We have several apple trees but most don't produce usable apples or they have just little ones. There is only one really good apple tree that is worth picking. I have no idea what kind of apples they are. I haven't made an effort to become informed about apples. I know 'Delicious' apples, 'Cortlands' and my grocery store favourites, 'Royal Gala' which taste more like pears than apples, but I am sorely lacking in apple knowledge otherwise.
This is what we harvested this morning. It's a lovely bunch of apples, especially for an organic, never sprayed tree. That's it pictured at the top too. Beautiful apples! If you know what kind they are, please tell me. They look like Macs.
The deer have already eaten all the apples within their reach, (which is also our reach). We didn't have a ladder so we had to climb. I climbed up into the tree and out on the branches to shake them, then we picked them up off the ground. The apples are the perfect ripeness now. Ripe enough to fall easily when the branches are shaken, but haven't fallen on the ground on their own yet. We didn't have a ladder so we had to do it this way. It worked well enough. We got lots of good apples!
I haven't climbed a tree in decades! I used to be good at it, once upon a time. I have become more careful in my older age. It was a humbling experience. I have lost some of my nerve, but I'm thinking maybe that's good thing...
The apples will sit in the kitchen for now, where I will work on them here and there. I had thought to leave them on the porch until I had time to work on them but, after remembering that we get racoon visits, moved them into the house. I must always remember the racoons!
These will be made into apple sauce, pie filling, baked apples and the good ones for eating will go into the cold cellar for storage. We can keep apples in there, at least this year, because we don't have any other veggies in there with them. We didn't grow potatoes or carrots. (Ripening apples emit ethelene gas that makes other things ripen very fast and not keep very long.) The squash will be in there, but just for a short time, until they are ripe, then they go into the freezer. I need the squash seed for the seed store.
It was a lot of work but well worth the effort! We are looking forward to homemade applesauce and easy pies!
I am also planning on making apple wine, of course, and I can do that in the middle of the winter :-)
All in all it was a great endeavour and well worth doing, even though I would not have wanted to do it by myself. Big jobs always go much faster and are more fun with a friend! Don't you think so? Thank you Janet for your help!
Update next day: I graded the apples into three categories and put them all into the cellar. They are in shallow boxes with newspaper between each layer. I have read that they keep the best if individually wrapped in newspaper but I'm not doing that! lol! This is the next best thing. I will probably process the "eat me first" category within the next couple of weeks. Possibly into wine, definitely into apple sauce.
I love having our own organic apples!
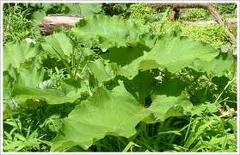
Edoes are a member of the colocasia family, as are taro and some elephant ears and they are similar in appearance. If you like those big, tropical leaves in the garden or pond, you can get them by growing edoes, or so I have read. I first heard about edoes on a pond forum many years ago but didn't see them in the grocery store until more recently. The roots are a common food crop in many tropical countries but that doesn't mean you can eat all taro roots. There are several different members of that family and not all are edible. These, apparently bake like a potato with more flavour and are good with sour cream and butter. Sounds interesting.

When I read about edoes and saw them in the grocery store, I thought it would be an inexpensive way to grow that beautiful, big, tropical plant in my garden or pond. I have always loved the look of the huge elephant ears my grandmother used to grow in her garden. I like taro in the pond too.
The edoe roots are not expensive in the grocery store. I bought one in the fall of 2008 and put it in the basement with the other tender bulbs, waiting on spring to plant it. A mouse ate it. This year I bought a couple of them in January and planted them. I have also read that you can buy taro roots, even black ones, as food in specialty oriental grocery stores for very little money, but I have not followed up on that.

I put the pots on the kitchen floor near the door with my other early potted dahlias and left them. In January, when I planted the edoe bulbs, it was very cold and, since my basement is unheated, my kitchen floor is icy. The other plants in the picture don't seem to mind the icy floor, but I know that colocasia bulbs need heat to sprout and having had elephant ear bulbs before that didn't sprout until July, I didn't expect much.
After they sat there for a few weeks, it occured to me that I could move them to my plant window upstairs where it is very, very warm and they might do better, so I moved them up there. Today there is growth!! I am so pleased!
This sprout is coming up from the side of the pot. I planted them on their side because I wasn't sure which way was up, or down and didn't want to plant them completely upside down. I figured that sideways was asafe bet.

I am looking forward to having these beauties in my garden. I have read that elephant ears like shade and do well there so I planted a few bulbs, that I got in a trade, in my shade garden last year. They didn't sprout until July and never got more than a foot tall. I was very disappointed.
This year I started them early and will put them in the sun. Sometimes people say that certain plants need shade, but those people usually live in much warmer climates. Plants that like some shade down there usually do well up here in the sun.
I read that brugmansias prefer some shade too, so I put some in shade and some in sun last summer. The ones in the sun grew to be twice as big as the ones in the shade and were the only ones to bloom, so I take this shade stuff with a "grain of salt". (I don't know where that saying comes from and have no idea why it means that.)
Here's a brug bloom from last summer:
I have a shade garden that gets some sun in the late evening and I have one the gets sun only in the early morning so I am always on the lookout for true shade plants that are big and interesting.
Eddoes are also known around the world as Arbi, Taro, Nampi and Coco Yam and are used in Indian, Chinese and Caribbean cooking.
Colocasia and alocasia are very similar in appearance but it is the colocasia that like the water. The alocasias do not, so before you put what you have in the pond, make sure you know what it is.
I have also seen yucca roots for sale in the grocery store and might buy one of those for the flower garden too.

I know that I mainly post about food and practical things around here, (I am extremely practical) but I do have some very large ornamental gardens, as well, and tend to hang out there more than anywhere else. That is where I putter. At the moment I am enlarging them, more for the purpose of ridding myself of grass to mow than for the acquiring of more gardens, per se.
I am currently enlaring the ornamental garden space. I don't say perennial bed because I also grow annuals, as well, and some shrubs. I hope to be adding small trees too. I collect all perennials, sometimes to the point of obsession, if left unchecked.
I have an iron bench the will go on the large cleared area. I am waiting for hubby to help me strong-arm it down the stairs from the deck. That thing is heavy!! It will make a nice seating area for me, when I want to pray, contemplate life, try to figure out myself and why I do some of the absolutely stupid things I do. You know...meditate. It's a good place to read, maybe. I hope that it will be so attractive a place that I will actually sit still there for a short time. I will have to spray myself all over with deet to sit there for very long in the evenings, but that comes with the territory, or the country, I should say.
 I am also adding more roses and have a few pink rugosa roses in pots, waiting for it. I am trying to root cuttings from my good rose too. I have some softwood cuttings in sand with plastic bags over them. I have one family heirloom rugosa rose. It is a mauvy dark pink sort of colour and smells wonderful (see photo)! It belonged to my MIL most of her adult life and to her mother before her. She gave it to me last year. They are getting on in years and don't have the ability to care for their once large garden. This is a special rose and has been doing well.
Last year it had rose chafers all over it and I was just too busy to take care of them. This year, I swear I am going to hand pick every single bug I see off of it! Maybe I will spray it with rhubarb leaf/organic tobacco water. I don't want to harm the bees, so that will be a "last straw". I am also considering drenching the soil around it with a watered down doggie flea shampoo that I have with pyrethrin in it. Will this harm the rose? Anyone know? I cannot lose this rose bush. I have to pass it on to the future generations. Anyway, I hope the cuttings take. I used rooting hormone and did everything I read to do. I have some hardwood cuttings too, in pots at the moment. I plan to stick them in the sandy ground and cover with a jar.
I want more roses, especially rugosas, for wine, cooking and tea.). (See "Cooking With Roses".) They produce an abundance of hips and I already know that the petals make good wine :-)
 I have picked up a lot of perennials in the past few years at the season end, mid to late July. Our Canadian Tire Hardware Store has a large greenhouse. They mark them all down to .25 at the season end and sometimes even .10 each! Two years ago I bought 30 of them at .25 each! Some didn't make it, but at that price, it's not much of a gamble. Many are doing well and blooming this year!
I have also acquired many through trading, plants and seeds. I am hoping to host a Barrie, ON area plant swap later this summer! I think it will be a lot of fun! I want to finish these new areas first and get the grass under control :-( and some other areas tilled (so the place at least looks "lived in". lol!).
I have listed the ornamentals that I have below. There are a lot of them! Some have not bloomed yet and I still have not seen a few of them yet this year, but most are doing well and blooming. It's an immense list! (I won't have seeds for all of them this year). I am finding it hard to believe that I actually have all of these myself. It's mind boggling to see it in writing! This list is also for my own benefit. I need a record of what I have growing out there.
amaranth 'intense purple'
aruncus, goat's beard
aster New England intense pink
artemesia "silver mound"
baby's breath, pink/white mix
beauty bush (kolkwitzia amabilis)
bergenia
bleeding heart, pink
bugle weed
campanula "sarastro" purple
campanula "glomerata" purple
campanula 'carpatica" purple
campion, rose and white
canna lilies, red flowers, red leaf and green leaf,
candy lilies
candytuft, white perennial
candytuft, purple annual
celandine, greater
centauria montana, mountain bluet
centaura dealbata, pink
cerastium tomentosum, "snow on the mountain"
cobaea, cup & saucer vine
colchicum
columbine garden mix
columbine native, red
columbine, winky red/white
cone flower echinecea, pink and white
cosmos mix
dahlia "keri blue"
dame's rocket, "hesperis"
day lilies, red
day lilies, Stella D'oro
daylilies, orange single
delphinium, small pink
dog tooth violet
euphorbia, "donkey tail spruge"
evening primrose
feverfew double flowers
filipendula rubra, pink meadowsweet
filipendula ulmaria, white meadowsweet
flax, red annual
forget-me-nots
four o'clocks, mixed
geranium, cranesbill bright fuscia pink
gladiola mix
globe thistle
hardy hibiscus mix
hens and chicks
hellebore
heuchera, "marvelous marble"
honeysuckle bush, pink
hosta "big mama"
hosta "blue angel"
hosta "Francis Williams"
hyacinth bean, purple and white
impatiens gladulifera
impatiens, red annual
iris, Japanese, blue and purple
iris, Siberian, many shades and mixes
Jacob's ladder, purple and white
joe pye weed
lamb's ear
lamium, "spotted dead nettle"
lilacs purple
lilies, oriantal/asiatic mix
lilies, Easter
lily of the valley, pink
lily of the valley, white
loosestrife, white garden
lupins, purple and pink
malva moschata, pink and white
morning glory mixed
monarda didima red (bee balm)
monarda fistulosa lavender
morning glory mix
obedient plant pink (definitely a misnomer!)
penstemon "husker red"
peony poppy mix
peonies
phlox paniculata, pink & "davidii" white (tall)
phlox sublata (creeping)
poppy, oriental "fancy feathers"
primula mix
rock cress, white
roses, rugosa
rose climbing "blaze"
roses, mini red and orange
rudbeckia "black eyed Susan"
rudeckia maxima (8' tall)
rose of Sharon
sage, Russian
sage, lyre leaved
scarlet runner beans
sea holly, eryngium
Sedum Stonecrop Red
Sedum Reflexum
shasta daisy
snowball bush
Solomon's seal, varigated
spirea "bridal veil"
sweet pea perennial mixed
sweet william mix
veronica, blue and intense pink
violas, "Johnny-Junp-ups" tiny purple/yellow combo
violets, yellow and purple
wisteria
yarrow, red
 Burdock has been the bane of my existance for the past three years! I have spent a few entire afternoons going about with the clippers, cutting off any and all flower stalks that grow on the rosette of leaves that has spread all over my property.
 Burdock is a biennial. It germinates and produces the leaf rosette the first year. It blooms and goes to seed, producing the burrs the second year, then dies.
These burrs can often be found in huge balls, wrapped up in my dog's fur, especially his tail and rear. It's uncomfortable for him, poor fellow! For this reason I have tried very hard to iradicate it, to no avail! I had more first year burdock this year than ever before!
Next year there will be a difference! I have done some research on the burdock plant this year and learned a few helpful things. Not helpful in getting rid of it, but information to help me appreciate it more.
 Did you know that "Greater Burdock", which is what I have growing all over, is edible? It is also called "edible burdock or Lappa burdock". The roots are highly prized and sought after by other cultures and used to prepare many dishes in Asia and the Mediterranean.
What I found most interesting is that the burdock plant is closely related to the artichoke. The young, tender flower stalks, apparently, taste like artichokes. U-n-b-e-l-i-e-v-a-b-l-e!!
 So, next year, I'll be hunting those flower stalks again, but with a different purpose in mind. Image that, we'll be eating burdock and it will probably be delicious! I don't think I will tell hubby what it is until after we have eaten it. He trusts me. He knows I am not going to feed him something that he cannot eat.
 Do any of you eat burdock? Do the young flower stalks taste like artichoke?
I have even put some seeds on my farm store! I am amazed at the idea that someone would deliberately plant it, but after some thought I guess it's not so far fetched. If it's really is that good, why not plant it? Just make sure you eat all the flower stalks before they make burrs and bury themselves in your dog's fur!
I can tell you right now that it can't possibly be more prolific and invasive than some other things I have growing here on purpose. I will have to post a picture of my now-chickenless chicken pen, covered like a jungle with curly dock and it's not really that invasive. At least it doesn't stick to my dog's fur! (I fed those to the chickens last year.) There is also a giant pumpkin growing in there and in the old chicken manure, it's HUGE!
 Burdock could be pretty and interesting in a perennial bed, I suppose, if one can release one's temptation to yell and demolish the THING on site!
So, a new discovery and a surprising one too! Another step in becoming a little more self sufficient!

 For this project you are going to need grapevine dried into a circle, covered wire, thin light wire, pinecones and evergreen branches. You can also add any little red berries and bells that you might have and you will need a big bow.
 Start with the same grapevine as in the previous post. The directions are the same as far as making the initial wreath, however, for an outdoor wreath you need to wrap the wire closer. All of the greenery stem will be held in place by the wire, so it needs to be wrapped close for a full wreath.
 When you have the wreath completely wrapped with wire and the hanger on the back then you prepare the pinecones. Any pinecones will look good. I have both the short, squat, round ones and the long, curved ones. I am going to use the long, curved ones for this wreath. The pinecones are wired to the wreath so they can withstand outdoor winds.


 Cut the greenery into small pieces. I have collected both pine and cedar here. It takes a lot to make a wreath, more than you think. I made one large full wreath from one wheel barrow full of greenery. Any everygreen will make a nice wreath. I have also used spruce which looks very nice. I particularly like the cedar due to the sweet scent, but the spruce has a stong everygreen scent that is nice too.


 Using the clippers, remove any small pieces that cover a pinecone. Make sure you leave enough greenery to cover any wire.
 Directions for making a bow are on the previous "Indoor Wreath" blog post.


