The first day of December signals a time for us to start decorating for Christmas. Ever year I make an outdoor Christmas wreath from evergreen branches cut in the woods and grapevine. This year I am going to make some indoor grapevine wreaths, as well.
 The grapevines themselves were collect two falls ago, stripped of leaves (the chickens like these) and shaped into circles to dry. You can read about that in a previous post
.
 These are just loosely tied and left to harden in that shape. They can be tightened and wired into actual wreaths later. I did this two years ago but did not have the time to make any wreaths with them at that time. It has taken me two years to get around to doing anything with these shaped and dried grapevines. This year I am going to use them.
I am going to make indoor wreaths first. I will make the outdoor wreaths later this month.
 The indoor wreaths are decorated with the tiny pinecones and acorns from our property, as well as ribbon and various dried berries, bells, tiny Christmas tree balls and any other tiny things you think will look good on it. I collect all kinds of things throughout the year at rummage sales and so forth, just for this purpose. Any tiny extras will look good on a wreath.
 I collected acorns last fall and left them on the porch all winter. They made an excellent winter food for a squirrel, so I collected more this year and put them inside to dry. The best way to dry pinecones and acorns is with salt. Sprinkle salt on them and it will keep them from mildewing or rotting and will help them dry and open. I collected tiny pinecones and dried them this past spring so they are ready to use. I collected the acorns just a couple of weeks ago but they are still good to use now.
 I looked around the field and found these to put on the indoor wreaths, also. I am not sure what they are but they are a weed and are still full of tiny seeds. I will have to be careful to collect all the seeds from these or they will grow in the flowerbed beside the porch or will scatter all over the floor of the craft room.
I am making the indoor wreaths, indoors where it is warm and I have a convenient plug for the glue gun. A glue gun is necessary for the little things. I don't use glue for the outdoor wreaths as glue doesn't hold the things on well enough for the blast of weather that it might get. I prefer to wire everything on the outdoor wreaths. They don't have many small items attached to them. A glue gun is a necessity for indoor craft work and you will need one for these indoor wreaths.
 After you have the grapevine shaped and dried it is time to make a tight wreath out of it. I reshape it with my hands and tie it with coated wire. The type or colour of the wire is unimportant, as long as it is dark. We are going to cover it with ribbon. Hold the grapevine with one hand while wrapping the wire tightly around it to hold all the pieces in place. Done this way, you can use small pieces of grapevine, as long as you keep the thickness even around the circle.
 After you have the grapevine shaped, wrapped tightly with wire all the way around and tied off, you are ready to move on to the next step - covering the wire with wide ribbon.

Start where the wire starts and wrap the ribbon around the wreath, over the initial wire and glue the end in place.
Continue on from there without cutting the ribbon, wrapping it around the wreath over the wire. You should glue it in place over the wire, in several places so it doesn't move off with wear.
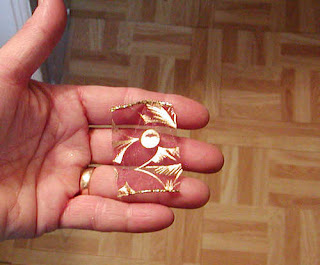
 You can use Christmas ribbon, as I have here, or ribbon that matches your livingroom if you want a permanent, non-Christmas, wreath. You can also wrap the wire with paper ribbon or wide raffia. Just be sure to glue the narrower ones in place over the wire.
When you reach the beginning, cut the ribbon and glue it in place. We are going to cover this beginning spot with a large bow, so glue all the ends of all ribbons and wraps used, in this same location, so that none of the ends will show when the bow is in place.
Your next step will be adding the satin ribbon in curls. Glue the end at the "beginning" position where you glued the ends of the other ribbon.
 Roll and curl the ribbon looselly, glueing it at each spot. Don't pull it tight. You will get better curls if you leave it very loose.
 You may need to move it around a bit to make the best curls and find the best location for glueing. After a bit of practice, this part gets faster and easier. Take the satin ribbon all the way around the front of the wreath, back to the beginning. If you are going around the wreath with it twice, just keep going. If you are changing colours or stopping here, cut it and glue it at the "beginning" place. You can also wrap it around the back of the wreath for a different design.
This "beginning" spot will be where the large bow will be attached. It can be the bottom of the wreath or the top.
 When you decide where the top of the wreath will be, it is a good idea to put on the hanger at the back before glueing a lot of little things onto the front of the wreath. Turn the wreath over on its face and use a bit of wire to make a hanger.
 When you are happy with what has been done so far, it is time to make the bow. You can use the same ribbon you wrapped around the wreath or a different yet coordinating ribbon to make the bow. First cut a piece of wire about 3" long to secure the finished bow. You will not have both hands available to cut the wire after you make the bow, so cut it now and have it ready.
 Leaving one long end hanging down, make the first loop. Clench the ribbon in what will be the center of the bow and keep holding it tightly, shaping it with your other hand. This does take a bit of practice but you can take it apart and continue to play with the ribbon until you are happy with it. Twist the ribbon so that the outside is always facing front, holding the twist tightly in the center with your fingers.
 Make the loop for the other side, clench it in the center and
let the ribbon hang down for the other end. Cut it off the same length as the first side.
 Keep holding it while you use the previous cut wire to twist around the center and hold the ribbon in place. You can make a bow with two coordinating ribbons, twisting one wire around the center of both.
Cut a tiny end off the same ribbon or a coordinating colour and make a folded strip to wrap around the center of the bow, over the wire. Glue this in place at the back of the bow. You can make as many loops as you want, for a bigger bow. Just keep making loops with the ribbon, twisting the ribbon so they are all facing outward.
When the bow is full enough, leave the end handing as described in the previous paragraph.
 Glue the bow in place on the wreath, covering the "beginning" spot where all the other ribbon ends were glued. If you have been careful to keep these ends glued close together, the large bow should cover them all quite well. If not, you can wrap that spot with wide ribbon until the ends are all well covered, then glue the bow on top of that ribbon.
 When you are happy with the ribbons and bows, you can start glueing on the natural decorations. I have a lot of small pinecones and acorns and they are free, so I use a lot of them. I like the look of the pinecones sticking out all around the sides and the middle. I put those on first, since I am using so many of them.
 Fill in the spots evenly with acorns, keeping the wreath artfully balanced. The seed pods are next.
 Some pinecones and small decorations can be placed above and below the bow.
 After the natural filler is in place, you can add the colourful decorations. I try to place these where they will cover up any glued ribbon spots that show or any other small problem areas. The larger, brighter and more visible ones come first. These are placed in a fairly balanced pattern around the wreath.
 The small decorations are then glued wherever they are needed and are scatted about, still keeping the wreath balanced.
I used small gold beads that I have had for years and not used, some fake red berries cut from another decoration that I bought for this purpose and took apart and some small bits of baby's breath.
Red and Green baby's breath looks good on Christmas wreaths, but I only have white at the moment and I think the white helps to brighten it up, if needed.
When you are happy with your wreath, hang it in a place of honour on the inside of the front door, on the wall or on the door to another room in your house.


