Comfrey


We grow our very own fertilizer - comfrey! It is easy to grow and spreads rapidly but we consider this a good thing. We use quite a lot of it on the garden throughout the summer!


Comfrey has a very deep tap root that collects nitrogen and other minerals from deep in the soil and stores them. When it is cut, it releases these things back into the soil. It makes a nurishing mulch for the garden! It also makes a healthy feed for fowl and farm animals!


I cut a couple of wheelbarrows full yesterday and mulched all the vegetables with it. It's quickly and easily done with a hack saw. I didn't strip the leaves off the stems, just laid the whole things on the ground around the plants.

Meadowsweet


I have a pink meadowsweet (filipendula rubra, ulmaria) plant in my flowerbed. (It also comes in white.) I have had it for years and only recently became aware of how valuable a plant it is.

It is large and beautiful, as always, but it also has a lot of other properties. The flowers can be used to add a soft almond flavour to wines, beers, jams and jellies. I LOVE almond flavour in anything. Before I developed this severe allergy to sulphite, I used to buy almond sherry and amaretto. They were always my favourite drinks. Now I can add this flavour to my wine too, naturally and without using almonds. There is nothing wrong with using almonds and I had planned to make some almond wine, at some future point. I can now grow my own 
almond flavour!


In addition to this important property, meadowsweet is also the plant originally used to develop aspirin. In 1897, a chemist called Felix Hoffman discovered salicylic acid could be produced from a waste product of the plant. He was looking for something to help his father's rheumatism and, while the benefits of this compound as a pain-relieving drug had been known for thousands of years, this was the first palatable and acceptable form to be found.

At the time, meadowsweet's official name was Spiraea and the drug that was made from it became known as aspirin. The invented word combined the ''a'' from acetylic acid and the ''spir'' from Spiraea. It contains several powerful salicylates, salts derived from salicylic acid that are chemically similar to aspirin but do not cause stomach bleeding. And, unlike aspirin, it has a positive effect on the digestive system, it protects and soothes the mucous membranes of the digestive tract, reducing excess acidity and alleviating nausea.

It can be used in the treatment of heartburn, hyperacidity, gastritis

and peptic ulceration. It is also effective against the organisms causing diphtheria, dysentery and pneumonia. The anti-inflammatory action of Filipendula (meadowsweet) makes it effective against rheumatic pain without the adverse effects which can cause gastric bleeding, and it also acts to reduce fever.

All the benefits of aspirin without the gastric bleeding!

Meadowsweet likes damp roots and will do well in a bog, but it also does just fine in a normal garden. Mine is in half shade in the flowerbed and we have had a lot of hot dry weather this year. It hasn't even wilted and bloomed beautifully this year! The ideal place to grow it is in a low laying meadow area that tends to retain a bit of moisture. I am planning on making a large area for it in my ditch next to the garden and beside the driveway. I don't use salt so there's no danger of runoff.

I am growing my own natural anti-inflammatory pain killer (and almond flavouring for wine)!


Building A Cold Frame


Those of you who live in the north, as I do, know the frustration of working with a short growing season. There are so many new and interesting things to grow out there and I would like to grow them all, at least once. Our short growing season, sometimes makes that difficult. I plant seeds early indoors on the windowsill but that is not always enough and there is not a lot of room on my windowsill. I could set up artificial lighting indoors but the cost in electricity would sometimes offset the benefits of growing my own food. A good way to overcome the short season is with a cold frame.


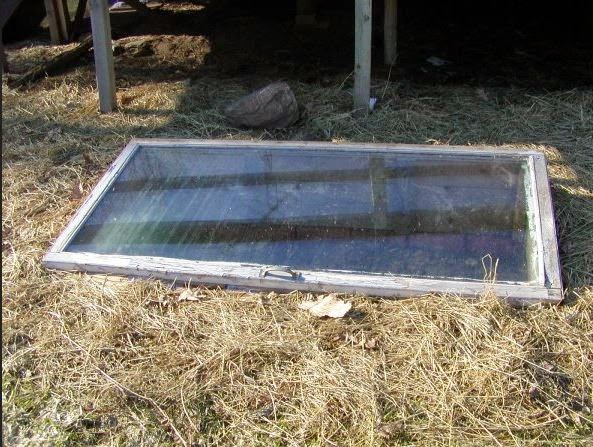
A cold frame is a small greenhouse built into the ground. This takes advantage of the insulating properties of the earth itself. The only glass you need is the top. I built mine using a glass patio door, but it can also be done with smaller windows. Double paned is better insulation against the winter cold but single paned will also work, especially if you are only using it spring and autumn and do not intend to overwinter plants inside a heated cold frame. Some gardeners put heating cables inside the cold frame in order to grow greens in there all winter. Other gardeners heat it with a manure and hay mix, taking advantage of the chemical reaction that causes heat. I only use mine for starting seedlings early in the spring and hardening off what I have started.


You can build a cold frame that will work well by just digging a hole in the ground. The hole needs to be just a bit smaller than the glass top to get a fair seal all the way around the lid as it sits on the ground. The lid can just be flat over the hole in the ground. This is a simple and yet workable cold frame. Put your vegetable and flower seedlings in the hole in the spring and cover with the glass top to let the sun in. This will protect the seedlings from the frost during the cold spring nights.


Before I had a cold frame I had many, many seedlings in trays that I brought into the house each and every night. I then brought them back out into the sun the next morning, in and out, in and out - it gets quite tedius. The cold frame made the entire hardening off process much easier. I just put all my seedlings into the cold frame as soon as it was barely warm enough and closed the lid. I did have to wash the lid first for the sun to get through. It was covered with little muddy racoon prints, among other things.

I lined my hole in the ground with 2" wood. I also cut the wood so the back would be 6" higher than the front. This allows the sun to reach more of the seedlings and gives me a bit more height to play with. I put shelves in the cold frame to raise the baby seedlings up to the window. I lowered these as the plants grew taller. It is important to keep the leaves of your seedlings away from the glass or they will rot on the glass and block the light. 

As spring goes on and the weather warms up, you may need to open the lid a bit during the hottest part of the spring day. The sun shining directly into the cold frame can raise the heat to a temperature that may cook your tender seedlings under the glass. This also helps to harden them off as they grow thicker stems to adjust to the breeze.


Glass patio doors are not hard to pick up for very little cost. I got mine free at the side of the road. I also managed to pick up four more new and single paned glass patio doors this past summer. All for free!! People are always rebuilding their homes and replacing old windows and doors. Keep your eyes open as you drive around and let all of your friends know what you are looking for.

I have visions of a long line of cold frames along the edge of the garden. I have the doors and wood to build them, I just don't have the time! It is an age old problem and a really nice dream!

Growing Corn


We LOVE fresh corn on the cob and look forward all summer for our corn to be ready. This year I am home full time, for a change, and have the time to plant the corn correctly.

Corn, like tomatoes, will grow roots up the stalk that is below ground. If you want strong corn that will withstand high winds, its a good idea to give it deep roots by planting, shallowly, in a trench. You then fill in the trench as the corn grows above the sides.

We have been through the corn that falls over during a storm or just falls over - period. Has anyone else experienced this mysterious corn toppler? Corn that is just laying on the ground in the morning for no apparent reason at all is very frustrating! At least, if it blows over in a big wind, I can put some reason to it but to just have it laying on the ground after a still and peaceful night can be maddening AND IT IS NOT GOING TO HAPPEN THIS YEAR! I am not going to let it.

Anyway, to make a short story long, I planted it in the bottom of a trench this year, eight rows of trenches to be exact. Each trench is about 8" deep and the corn is planted shallowly in the bottom. I would have liked to make the trenches even deeper but, well, its just me and I had a lot to plant and time is short, you know how it goes...

I plan to hill them up like potatoes, as they grow.

After I dug the trenches and planted the corn, I watered it thoroughly. We are going to be about 1.5 weeks without rain, until it rains this weekend so I am watering everything now as I plant it. We are on a well and have a lot of water. The water table is so high here that just on the other side of our fenceline is a black standing water swamp that never dries. Big machines have been running back in there lately, clearing trees and such. I think they are working out a way to drain it now that the forest belongs to the city. I hope so! It makes the mosquitoes bad here! Bats are very welcome!


Another way to keep the corn erect is to plant pole beans to climb on it. Three or four vines per stalk is enough. The beans will hold the stalk up in a strong wind and give it strength. They will also add nitrogen to the soil as they grow, giving the corn the extra nitrogen that it needs. Corn is a heavy nitrogen feeder.

(This is not my picture.)

I started three flats of corn early indoors this year to get a head start on it. I planted it out in the garden a couple of weeks ago. Then came the snow. It didn't survive. Transplanting tiny plants is a lot more work than planting seed. I don't think I will do that again.

Our corn is not up yet but I check on it daily, hoping it is tall enough to plant the pole beans that will grow on it. This is a short version of the "Three Sisters Garden" without the squash. Our squash has it's own garden. I spent yesterday planting it. Now we just wait and wait...

Dealing With Weeds


If you hear someone say they are purely organic and have no problem with weeds, they are LYING! Weeds are the bane of the organic gardener/farmer. They sprout up everywhere and are so hard to keep away!


I have a very long fieldstone walkway with a step, across the front of my house and around the corner. I installed it myself over the last three springs. While I like the look of it, I do have a problem with weeds growing between the stones. I know, I could have put something between the stones, like mortar, but...well, I didn't and I probably won't either. That project is finished, done, written off and completed as far as I am concerned. I have moved on to other things, however, I do have to deal with the weeds.


I have been just sitting down on the rocks and pulling them or digging them out with my little spade. I have read over the years that vinegar mixed with a little dish soap will kill weeds and that pickling vinegar will work the best. I have looked here and there, sort of, for pickling vinegar and not seen it anywhere and I use the antibacterial dish washing liquid and am not sure that it is the same stuff. These things considered, I just have not tried it before today.

A couple of weeks ago, my mother-in-law told me that she uses vinegar on the weeds and grass that grow in her driveway and it kills them fast and dead. So much so that she has to be very careful with the overspray as it will kill anything it touches.


After that bit of info I decided to try the vinegar thing. She uses just cheap, plain, white vinegar so that is what I bought too.
I poured some into this little sprayer for the little weeds on the walkway and driveway. If you live in town, you probably think these weeds on my walkway are big weeds and this is a big weed problem. Trust me, you haven't seen weeds until you live in the country!


These are the little weeds around the chicken houses and the next ones are the little weeds under the deck.


I sprayed all of these today with that little sprayer full of vinegar, well about 4 sprayers full of vinegar, but I got them all sprayed. If it works and they do, indeed, die from it, I will get out the big gun and fill it with vinegar! 


Then I will use it to spray THESE weeds:

I have battled burdock and thistle since we have lived here. If I can just spray them with vinegar and they will wither up and die, I will be thrilled!

Garden Friends


This lady lives in my garden! I took this picture of her yesterday. She is a Garden Spider Argiope. They are also called "corn spiders".

Garden Spiders are not harmful to humans and eat mosquitoes and any other bugs in the garden, most of which eat your plants. I'd love to have one living in my rose bush next June when the rose chaffers make their appearance or in the hibiscus plants when the sawflys show up! I wonder if I can move one to the rose bush in the spring...

They are not at all aggressive and will usually only bite you if you handle a female with an egg cocoon in the web. Even then, the bite would be no different than a wasp or bee sting. They are not poisonous and reports of them biting humans are rare. They prefer not to leave their web unless absolutely necessary. They spin the most beautiful webs with a "Z" across the middle, which can sometimes get as big across as 2 feet! This dense center section is consumed every night and rebuilt in the morning.


The female builds the webs and lays the eggs around the edges of open sunny fields. They tend to stay in one place most of their lifetime, which is 1-2 years. They mate once a year, after which the male dies and is consumed by the female.

I have seen several of these around my field and back garden this year but this lady is the biggest I have seen so far. Isn't she beautiful! I leave them alone as much as possible, but come on, I have to pick the ground cherries!

I have a lot of garter snakes too, and love them! I just wish Shadow and Abby (the kitties) would leave them alone. Abby, in particular, seems determined to bring them home with her! Bring the mice home dead, leave the garter snakes, please.


A Winter Sewing Success Story


Back in January, I posted about this year's wintersowing. You can read that post called, "Wintersowing". (I'm not big on fancy, complicated titles...)
That project was a success! I only got around to planting one thing in pots, the echinacea "Double Decker" and it's up! I did plant a lot more seeds in a cold frame. I will have to check those today to see if they have sprouted, as well!

I'm so thrilled! The echinacea "Double Decker" looks like this.
OK, now that I know it does work, I will be trying other things next winter.

I have done wintersowing before but never had much success with it. I think it's because I used shallow trays (top picture) that dried out too quickly. This year I used a soda pop bottle cut in half.

Growing Sweet Potatoes in the North


We love baked sweet potatoes with real butter! I buy them occasionally when I feel like a treat for dinner. It was only last year that I began to research how to grow them myself and if it would be possible up here in the north.

It is, indeed, possible but does take some knowledge and a bit of preparation.


Sweet potatoes are grown from "slips" which are live cuttings from a sweet potato vine. You can buy sweet potato slips from nurseries here, shipped to you at planting time in the spring. You can also grow your own slips now and have them ready to plant out as soon as all danger of frost is past.

Sweet potatoes do not take frost so cuttings must be held indoors, in a cold frame or a greenhouse until time to plant into the garden with the other tender vegetables.


Because they like very warm soil, it is a good idea to prepare a raised row for them. Raised beds warm up faster in the spring. This can be an planter or just a row in your regular garden that has been piled high.

Another way to warm the soil early and almost a must for sweet potatoes is using black plastic mulch. The black mulch will quickly get hot in the spring sun and the soil underneath will be a good temperature for your sweet potato cuttings when they are ready to plant. I have read that the big box hardware stores, like HD and Rona, get shipments of wood covered with large sheets of black plastic which is discarded. I have both of these stores near me and plan to ask them if I can take some of this off their hands.

Black plastic mulch can be used to kill weeds in fields before planting in the spring, as well. Cover the field with it and it will quickly become so hot underneath that it cooks the grass, weeds and weed seeds in the ground, or so I have read. I am hoping to get enough black plastic this spring to try this or, at least, enough to cover my planned sweet potato rows.


To grow your own sweet potato "slips", you need whole sweet potatoes. Stick three toothpicks into the potatoes and suspend them in water. If they are warm enough they will root in the water and grow sprouts. Its these sprouts that you can cut off, root inside and plant in the garden in spring. The sweet potato cuttings or "slips" will quickly root and grow into large vines in no time. It gets big quickly. As the vines grow inside, while you are waiting for spring, you can continue to cut them into smaller pieces and root those, as well.

It is very important to keep the sweet potatoes warm while rooting. I bought two last year from a small grocery that were labelled "Ontario grown". Figuring these would be the short season variety I would like to try, I bought a couple. I suspended them in water for months and they didn't root until it got warm in the house in early summer. I kept them by the back door and they were always cold.


This year I bought three from a large grocery. I don't know if they are northern ones or not but I will try them anyway. I put these in the room above the wood stove and they rooted quickly. All three are well rooted and one has sprouted.


This will be my sweet potato sprout rooting tray. It is just potting soil from the store kept slightly damp at all times. There is one sprout that is big enough to cut and root. Always use a knife when taking any cuttings. If you use clippers or scissors you might crush the bottom so much that it cannot take up water.


This is the one cutting big enough to root. Pick ones that have a couple of leaf nodes on the stem that can be planted under the soil. This is usually where roots grow on cuttings, although not always. Some plants grow roots all along the stem, i.e. brugmansias.


Remove the bottom leaves or they will rot in the soil.


Use the knife to make a hole for the cutting and put it in the hole, filling in with soil and covering the leaf nodes If you have rooting hormone you can use it on these sprout but I don't think it will be necessary. Keep the sprouts very slightly damp until you see new leaf growth.

I am hoping to grow enough sprouts to fill several trays with growing plants before spring.

Sweet potato vines grow across the ground while the sweet potatoes themselves grow under the ground, like regular potatoes. They will cover a large patch quickly in warm soil.

(Sweet potatoes are NOT potatoes. Its a different plant altogether.)
Harvest your sweet potatoes in the fall before frost. Do not wait until frost takes the vines or the sweet potatoes will not be as good.

After harvesting your sweet potatoes you will need to let them cure for several weeks. This is the time the starches are turned to sugars. If you eat them before they have cured, they will not be as sweet. Put them on a screen, out of the sun, in a place where they will not freeze, where they can dry for weeks. They will keep until the following year if stored cool and dry, but not too cold.


You can grow your own sprouts for the following year from some of these potatoes you have grown. You can also take cuttings from the vines to grow indoors until time to cut them up into small pieces for next spring.

This will be the first time I have grown sweet potatoes. I am very excited about it! It will be one of my pet projects for this year.