It's so much healthier!


Drying & Processing Herbs

Drying and Processing Herbs
.jpg)

For my general healing salve, I use plantain, purslane,dandelion, horsetail, yarrow, calendula, lavender, rose, spruce, lemongrass, rosemary, peppermint, clover, feverfew, cayenne, stinging nettle, thyme, oregano, usnea, chamomile. This is the basic salve recipe but there are others I can and have used, i.e. creeping charlie, dead nettle, hen bit, sow thistle. All of these have anti-inflammatory, anti-bacterial, healing properties. You might want to do an allergy test before using these herbs, just to make sure you aren't making a salve that you react to. Know the herbs you are using. If in doubt, skip it.

I enjoy gathering, drying and working with herbs. It's relaxing to be out in the fresh air and sunshine, gathering. I like the herbal smell they give my house and I find the handling of the fresh herb to be healing, especially for my hands. I try to gather leaves and flowers with long stems or small branches so I can hang them in bunches. I dry small pieces on a paper towel, turning them daily or on a screen. If you can score some large screens and bricks you can make a screen shelf on a covered porch, specifically for drying herbs and seeds. I like to put a layer of window sheers over the screens to catch the tiniest seeds and herb pieces. If this set up is outside, the mice and squirrels will like it too. That's what cats are for..

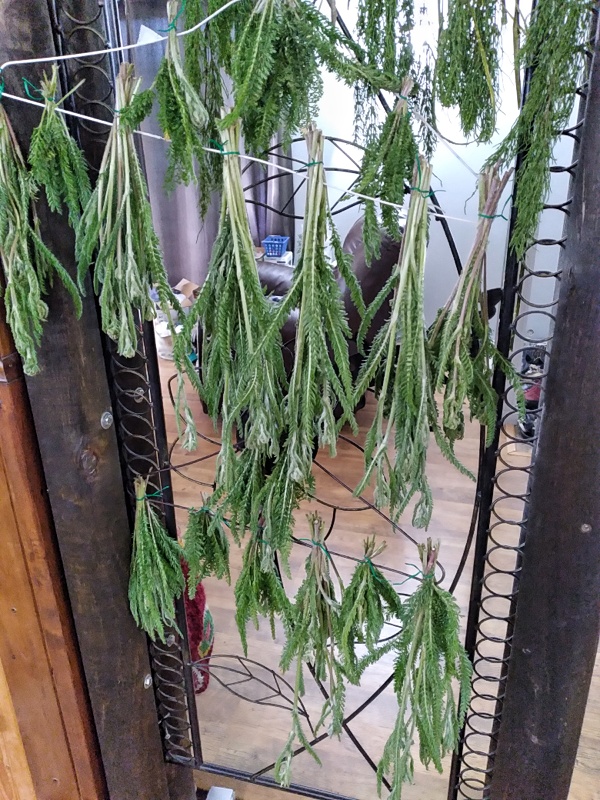
I use tin ties to tie the bunches of herbs. (No, I didn't put the tin ties in the microwave. lol). I add a scrap of paper as a label. The dried herbs often all look alike, so it's important to label them. I then tie the bunches to a clothes hanger for easier hanging. I have strung wire under the porch roof for hanging, I have hung herbs on lights and lamps, on hooks in the wall, on shelves, on string across the wall, on curtain rods, on ceiling fans, anywhere I can find to hang them.

 When the herbs are very dry, I crumble and grind in my spice grinder, if they need it. Some are fine enough without grinding. Then they go into glass jars with tight lids. Clean pickle jars work well. Any clean glass jar will be fine. The herbs will keep for a very long time like this. I collect, dry and process them in the growing season, then make the salves in the winter.
Growing Winter Squash & Pumpkins

Squash is one of my favourite vegetables from the garden. This also includes the sweet pumpkins, which are in the same family. It is so versatile and so good for you! It can be boiled, baked, sliced for the BBQ, grilled, baked in a pie for dessert and made into delicious soup. It can also be eaten with lots of real butter and a drop of maple syrup for a side vegetable dish.

I took an interest in the various different types of squash this year and planted five different kinds of winter squash. Having grown only hubbard, acorn and buttercup in the past, I was astounded at all the types of winter squash available out there. Some have long growing seasons and may not do well up here, but most of them look like they will produce well enough if started early indoors and given lots of hot, sunny weather. Unfortunately, we didn’t get the hot, sunny weather this year, but I think we will have plenty of squash, nonetheless.

In the actual vegetable garden, I planted hubbard, ambercup (a golden buttercup type), butternut and nutty delicata. I have never grown the nutty delica squash before, but I thought it sounded good. I love nuts and this is suppose to have a “nutty” flavour. It is a relatively new Japanese ebisu hybrid type. I have not previously grown butternut, either, although I have eaten it and seen it in the stores.

I planted acorn squash in the back field on the fence. Only two of those came up but I grew a very large acorn squash plant in the front flowerbed. It was an accidental dropping of the seed in the wrong place, but that bed was new and needed some greenery anyway, so I left it there.

It took over a large part and is producing extremely well, much better than the same seed grown on the back fence. I think that is due to the extra chicken manure dug into the flower beds. It looked nice there too with the large golden blossoms and huge green leaves. I may consider doing that again next year. Is that what is referred to as a “Potager Garden” – vegetables mixed in with the flowers? I like it. It had four little squash on it until yesterday. I accidentally left the gate open and the chickens got into the front yard. They ate three of the little squash. I managed to cover the other one up with a bucket for the rest of the evening. They had not found it yet. The vegetable garden has a fence around it to keep out the groundhogs that live under the garage, so the chickens cannot get in there.
In my search for squash types, I found one in particular that interested me. It was the Hopi pale gray winter squash. I came across a reference to it as being an especially good “keeper”. These squash are an heirloom variety originally grown by the Hopi indians but have almost dissappeared. When I tried to find a source, I was dissappointed. The Hopi squash are very difficult to acquire. I did manage to get some seeds, in a trade from this year, 2009, for both the Hopi pale gray and the Hopi black squash, to grow for next year. Since they are from more southern regions I will start them very early next spring on a heating source. I am excited about growing these next year to test for the perfect squash and as a source of rare seed.
All of my winter squash plants have small squash growing on them, except for the butternut. The first female butternut flower opened this morning. I hand pollinated it. Even the long seasoned hubbard has small squash growing. We have had exceptionally cool weather this year. I don’t know why there is a difference.
Perhaps the butternut need more heat? They are all in the same bed and have received the same treatment. I planted the butternut because I read that they were good producers, making a lot of squash on one plant. We will see how it goes…
I am looking for the perfect squash. One that is not stringy, keeps all year and has a fabulous, sweet and nutty taste. Is there such a thing?
Squash like to be grown in very light, loose soil so the roots are well aerated. They are nutrient hogs and like a lot of water, without being waterlogged (see previous sentence). I dug chicken manure into the hills where I planted the squash and I have occasionally fed them with organic commerical transplant fertilizer with a high phosphorus content, that I bought at a garage sale. Avoid using a high nitrogen fertilizer as this causes lots of leaves and few squash.

Squash, pumpkins and gourds are all from the same general family and all depend on bees for their pollination, so a small and dwindling bee population causes a poor harvest. (What will we do when there are no more bees?? ) Last year I had a lot of flowers and very few squash, signalling poor pollination. I am hand pollinating my squash this year and it has made a difference. All of the female flowers that opened were hand pollinated and are now growing small squash. This is exicing and so rewarding! I did that myself! It can be frustrating when the male flowers are plentiful and the female flowers have not opened yet.
 |
| Male Squash/Pumpkin Flower |
The male flowers open first in the center of the vine. The female flowers are located further along the central vine and on the lateral branches. The male flowers are on taller stalks while the female flowers sit tighter against the branch on a little ball which, if pollinated, will be the growing squash.

 |
| Female Squash/Pumpkin Flower |
To pollinate the female flowers you will need to use a small paintbrush. Just rub the paintbrush against the pollen in the male flower and then paint the pollen onto the center of the female flower. You can also pick the male flower, remove all but the pollen sitck and rub it against the center of the female flower. I prefer to use a paintbrush and leave the male flower growing where it is, to be used again later unless there are plenty of open male flowers.
There are many rare and delicious winter squash out there, yet to be discovered. Some are heirloom varieties that have been grown for centures in North America and have just slowly been replaced with the modern hybrids and genetically modified versions. One of the main reasons for that is the patenting of hybrid and genetically modified (GM) seed. Seeds from vegetables grown from patented seed cannot legally be saved by the grower for the following year. The farmer legally must repurchase these seeds each spring. Natural and heirloom seeds cannot be patented and so, there is no money in selling them. Large seed companies, such as Monsanto, sell only genetically modified and patented seed. The old fashioned heirloom varieties are slowing dissappearing. The gene pool is shrinking and we are losing valuable material. Not necessarily inferior material either!
We really enjoyed the little acorn squash last year, baked with maple syrup, raisins and dried cranberries and I know that hubbard and buttercup both make excellent pies. Some softer skinned buttercup varieties of squash do not keep very long, however, so they need to be cooked and frozen shortly after harvesting. I have read that the delica squash are not good keepers, either, so we will cook and freeze those when they are ready.
I have collected a selection of squash recipes that we have found to be delicious and have made many times. Winter squash and sweet pumpkin are interchangeable in any recipe, since they are the same thing. Pumpkin and squash are both members of the gourd family. No canned pumpkin will ever taste as good as the homegrown vegetable.
Indoor Herbs


It's fall, here in Fort Nelson, BC, so I have brought in my tender herbs for the winter. Some are not necessarily tender, but they don't always come back in the spring up here. I treat the feverfew and purslane tenderly, as they are not available to forage or buy here. I grow them from seed, so I like to keep a small piece over the winter. I will start more in the early spring from seed, but I still like that safety net of having one growing indoors.
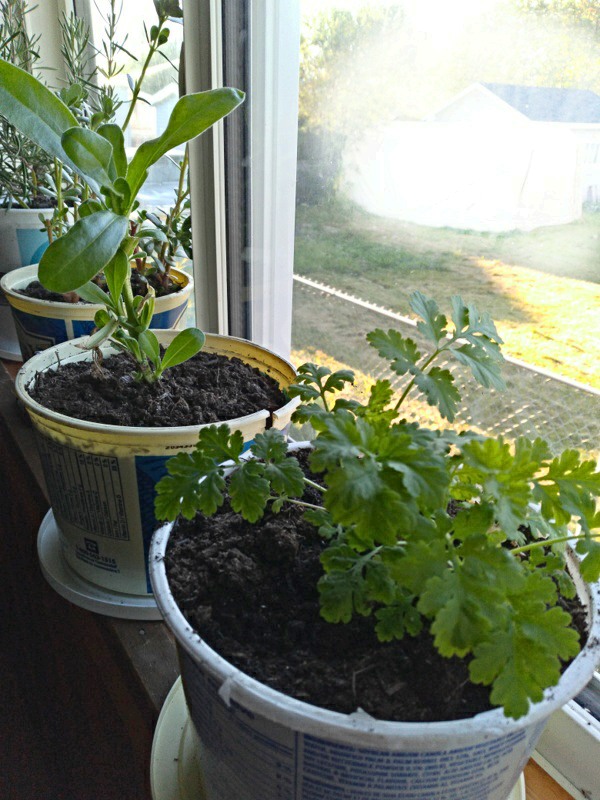
I have brought in the lavender, rosemary, oregano, purslane, feverfew and one
calendula. This is the first winter I have tried calendula indoors over the winter, so I'll just have to see how it goes. If it fails, i can always grow again from seed. Those seeds are readily available just about anywhere."
Growing Strawberries From Seed

This past December, I saved seed from some large, delicious strawberries from the grocery store. I dried the seeds and stashed them away with my other "odd" seeds. I freely admit it, I'm a seed-aholic. I must save all seeds! This does result in a rather large container of odd seeds for every occasion. The strawberry seeds are very tiny!
 A few days ago I saw a post on the Facebook "Grow Food Not Lawns" group about successfully germinating strawberry seeds. It reminded me that I have strawberry seed and I could do this too!
 After a little research, here is the information I found re starting strawberries from seed:
- Better germination rates are attained if the seed is refrigerated for about 4 weeks first.
- They need to be in some small amount of light to germinate, after refrigeration or right away if not refrigerating first.

I also sprinkled some on a shallow tray of soil mixed with vermiculite, moistened first with very warm water. I pressed the seeds down on the soil. I did not cover them with soil, as they need the soft light to germinate, and put a clear lid on the container.

The articles I read said that some germination is attained with the soil method, without cold first, its just that better germination is attained with the cold, so I have done both.
We'll see how it goes!
Lasagna Gardening - How To Start A Garden

Contents of this very long article on starting a garden:
- Lasagna gardening - an explanation
- How to make a no till garden on your lawn
- Raised gardens
- Organic Mulch Layers
- How to plant in a lasagna garden
- Weeding
- Going Vertical

Lasagna gardening is a no-dig, no-till organic gardening method that results in rich soil with very little work from the gardener. The name "lasagna gardening" refers to the buildup of layers of organic material on top of cardboard or thick newspaper, also known as “sheet composting."

 Wet the cardboard/paper area down to keep everything in place and layer with organic materials. The grass and/or weeds underneath will break down fairly quickly because they will be smothered by the newspaper or cardboard, as well as by the materials you're going to layer on top of them. Overlay the edges, or the grass will grow through! This layer also provides a dark, moist area to attract earthworms that will loosen up the soil as they tunnel through it. If you don't yet have organic layers, you can keep the cardboard down with rocks, bricks, logs or anything else you have that will keep it from blowing away.
If you already have larger plants in place, layer the cardboard around them, giving them an inch or so of space to keep the wet cardboard from touching the stems. Layer organic mulch on top of this. Do this as the summer wears on and the initial paper/cardboard starts to break down. Continue to layer around the mature plants to keep the grass and weeds from growing. When making a garden on a lawn, grass will be a more insidious problem than weeds.


If your ground is very hard clay, gravel, sand or rock, I would recommend making raised gardens. They don't have to be deep but higher sides makes gardening easy for people with bad backs or physical limitations. Also keep it narrow enough to reach across from one side. Three feet is the widest across I would build one. It can be any length or even U-shaped. Build boxes to contain soil on top of the lawn. You will still need to do the layering with cardboard/paper inside the box. You would be surprised how far some grass and weeds will grow to survive!
 Filling the raised boxes: "Hugel Culture" (Hugelkulture) is making beds on top of log piles. Its quickly catching on as a way to make raised garden beds, letting the old logs feed the soil and plants. Fill those raised beds with natural branches and logs on top of the cardboard, before you fill it with soil. You will need less soil. Put several inches of soil on top of the wood. Layer this with mulch to keep the weeds down. They will grow on any open dirt spots, even in raised beds. The wood will decompose and feed the soil, gradually. The plant roots will grow into it. In three years the logs will be gone, making rich soil.


Raised bed are also easy to cover. Use 1" pvc for the arches, cover with plastic for a mini greenhouse, or curtain sheers for protection from deer, cabbage moths, etc.


Organic Mulch Layers
Some choices for organic mulch layers:
1. Manure! I would recommend using well composted ** (See Note below) manure around the growing areas directly on top of the cardboard/paper. If your lawn has been growing grass and/or weeds, the soil will be depleted. Also any wood based layers you have will use up the nitrogen in the soil as they break down. The manure will fix that and replace any other needs in the depleted soil.
2. Grass clipping after mowing, if not sprayed,
3. Fall leaves, mowed to chop them up,
4. Shredded computer paper. Ask offices for it. Its wood based,
5. Wood chips * (See Note below on wood based mulch in the garden),
6. Straw,
7. Hay, only if going on top of cardboard. Don't put it directly on the ground or you will be growing grass there,
*NOTE: Wood based products are fine in the garden, as long as you add some well composted manure for extra nitrogen. Wood uses up the nitrogen in the soil to decompose.
**NOTE: Make sure any cow/sheep manure you use has been properly composted: piled for a season so it gets really hot, hot enough to kill the weed seeds, or you will be growing grass and weeds. If you are not sure how hot it has been composted, put it underneath the cardboard. If it has not aged enough, the high nitrogen content will kill your plants. Chicken manure needs to age for two years before you can safely put it on your plants. Store bought manure is fine.
Planting: For the seed rows,
Option #1: Put down a layer of fine soil or compost on top of the mulch for the seed rows and plant in it. Top the seeds with soil and press down lightly. A rule of thumb for how deep to plant seeds: Soil on top of seed should only be as tall as the length of the seed. So something like carrot seed should only have a light sprinkle of soil on top. The roots will grow down through the layers and eventually through the cardboard.
Option #2: Lay the initial layer of cardboard, leaving 1.5" - 2" inch rows open on the ground for planting seeds. Cover the cardboard with organic layers. On top of the organic layers, keeping it visible, cover your open seeding rows with cardboard you have weighed down with rocks or bricks to hold it in place temporarily. When planting time comes, most grass and weeds will be dead and smothered under the cardboard. Remove the top cardboard over the planting rows. Plant seeds directly in the ground in these very narrow rows and cover lightly with a layer of compost. Water very gently and press down lightly.
For myself, I usually use a shovel and dig up just these narrow rows and remove grass clods, roots and any perennial weeds before laying down the cardboard. However, I don't believe its entirely necessary. I just like to spend a little time in the spring digging in the dirt :) .
For transplants, simply pull back the layers of mulch, drop in the plant and pull some mulching materials back over the roots. Leave a little space around the plant for air circulation.
Weeding: As you watch these rows grow, carefully leaving only the sprouting vegetables, pull up or cut off any weeds/grass that grows. If not sure, just leave it to grow awhile and then pull up or dig out any weeds that grow in this row with the vegetables. If left to grow, grass will become a more insidious problem than the weeds. As long as the weeds don't go to seed or interfere with the growth of the baby vegetables, they can be left to grow until its safe to remove them without damaging your tender, baby vegetable plants. There won't be much to weed out and once it's gone, weeding these very narrow rows will be easy. When the vegetable plants are tall enough and you have thinned them, place cardboard and mulch between the plants to keep the weeds/grass down. Keep placing cardboard and inches of mulch wherever grass and weeds begin to grow.
I recommend setting aside one day every week for weeding. Using a hoe for larger seedlings or by hand with smaller ones, weed the entire garden, covering with cardboard those areas where the grass and weeds are growing. If you have been using the cardboard everywhere around the plants and in the open areas, there won't be much to do. One morning a week, weeding needs to be your focus, everything else waits. If you do this, you won't have a weeding problem and gardening will be fun and easy. Pull baby weeds as you do your daily walk through your garden to see the changes and just to enjoy your garden growing. Pull any grass and weeds you see when they are little. Don't let the work get ahead of you or it will take time to catch it back up. Note: Control the grass. Grass is hard to control once it takes over.
Going Vertical


 |
| (Not my yard) |
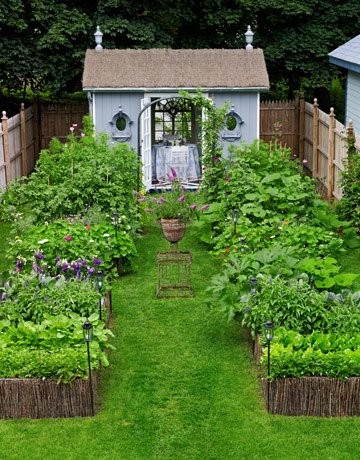
Lasagna gardening is definitely the way to build vegetable or flower beds! We use this method for both. Because it uses no power tools, heavy equipment or expensive commercial additives, lasagna gardening is an easy way for anyone to maintain garden productivity.
If you have deer or large dogs roaming around the neighborhood, you might want to put a fence around it. It will keep out the dogs, anyway...
Winter Sewing

 |
| Russel Lipins |
These seeds were planted in December and put outside for the remaining winter months. I lost track of them outside when the snow was deep, but found them again a few days ago. I brought them inside and put them under lights in the warm house. Now they are coming up! I planted with them with several other perennial seeds but these are the only ones up, so far. It has only been three days. I'm sure the others will start sprouting in the coming weeks.
Rhubarb

 We love rhubarb, especially rhubarb pie!
My rhubarb grows in the lasagna garden with my salad things, herbs and berry collection. Most of that garden is perennial so it makes sense to grow it there, since it is perennial. I like to till up the vegetable gardens in the fall and spring.
I am adding to my rhubarb this year, since we have discovered rhubarb pies. I originally planted it for wine making, which I still plan to do. I will only make one gallon this year, just to see if we like it and because I don't have a lot of rhubarb right now.


The rest will go into the freezer or be canned for winter pie filling storage. I like to make the pie fillings ahead of time and freeze them. I also make pastry ahead and freeze it, so pie making is simple and quick.

If you have common red rhubard, it should be picked when the entire stalk is red. The green parts are not that good to eat since they are not ripe yet. If you pick it when it is green at the top and add that to the rhubarb you use, it will be extremely tart. The secret to good rhubarb is to use it only when it is ripe enough, unless you like it very tart. Your rhubarb is going to be very tart, that's its nature. You will just need to add more sugar to it.
The bottom of the stalk should be a dark wine colour.
The peel of the rhubarb cooks to a very tender state. When the rhubarb is cooked you won't be able to tell the peel from the rest of it, so it doesn't need to be peeled first. Its not like celery, where the peel stays tough and stringy. You will waste a lot of good fruit if you peel it first. Do cut any brown or black spots off, however.These have a bit of green at the top that will need to be cut off.
 Chop it up into little pieces before you cook it and it will be more tender and cook faster.
This is my pie filling recipe for Rhubarb pie:
4 cups chopped rhubarb
3 cups sugar
1/2 cup flour
Combine well in pot and simmer on low, stirring well. Cook on low until slightly thick and bubbly, stirring more or less continually. Pour into prepared pie crust, put the top on and bake immediately at 350F for 45-50 minutes, until the crust is well done, top and bottom. You don't need to cook the filling while baking the pie, since you did most of that before you put the pie in the oven.
If you are adding the hot filling to a pie crust, you have to bake it right away. The hot filling will melt the fat in the crust and it won't be the same if you wait, so preheat the oven while you cook the filling. If you are not baking it right away, store the filling separately in another container until you are ready to bake the pie.
To freeze the filling: let it cool completely then spoon into a freezer bag. Get out all the air and flatten it. Flat bags stack in the freezer and take up less space.
Just an important note: Rhubarb leaves are very poisonous. You can make insecticide out of them that will kill anything.
If you have common red rhubard, it should be picked when the entire stalk is red. The green parts are not that good to eat since they are not ripe yet. If you pick it when it is green at the top and add that to the rhubarb you use, it will be extremely tart. The secret to good rhubarb is to use it only when it is ripe enough, unless you like it very tart. Your rhubarb is going to be very tart, that's its nature. You will just need to add more sugar to it.
The bottom of the stalk should be a dark wine colour.
The peel of the rhubarb cooks to a very tender state. When the rhubarb is cooked you won't be able to tell the peel from the rest of it, so it doesn't need to be peeled first. Its not like celery, where the peel stays tough and stringy. You will waste a lot of good fruit if you peel it first. Do cut any brown or black spots off, however.These have a bit of green at the top that will need to be cut off.
Chop it up into little pieces before you cook it and it will be more tender and cook faster. This is my pie filling recipe for Rhubarb pie:
4 cups chopped rhubarb
3 cups sugar
1/2 cup flour
Combine well in pot and simmer on low, stirring well. Cook on low until slightly thick and bubbly, stirring more or less continually. Pour into prepared pie crust, put the top on and bake immediately at 350F for 45-50 minutes, until the crust is well done, top and bottom. You don't need to cook the filling while baking the pie, since you did most of that before you put the pie in the oven.
If you are adding the hot filling to a pie crust, you have to bake it right away. The hot filling will melt the fat in the crust and it won't be the same if you wait, so preheat the oven while you cook the filling. If you are not baking it right away, store the filling separately in another container until you are ready to bake the pie.
To freeze the filling: let it cool completely then spoon into a freezer bag. Get out all the air and flatten it. Flat bags stack in the freezer and take up less space.
Just an important note: Rhubarb leaves are very poisonous. You can make insecticide out of them that will kill anything.
Subscribe to:
Posts (Atom)